


No one wants their wig falling off or shifting back and forth all day; to prevent that, many use wig glue. But what should you do if you lost your favorite wig glue or are sensitive to adhesives? You’ll be glad to know that you’ve got options. This article will introduce you to some wig glue alternatives you can try, along with the pros and cons of each one. We’ll also tell you how to choose between the different techniques so you can find the one that works best for you.
Wig Glue Alternatives to Try Today
Wig glue can cause skin reactions and may even lead to hair loss over time. So, if you want to ditch the wig glue and try another wig securing method, here are some effective alternatives. For each process, start with your hair pulled back and secured with bobby pins or thread.
Holding Spray
Holding spray is one of the most popular adhesives used for securing wigs. It creates a long-lasting hold that is much gentler on your hairline than glue. You can also build up hair spray into layers without any visible bulkiness. Here’s how to use holding spray to keep your wig in place for an all-day slay!
Gather Your Materials
- Maximum strength holding spray (got2b Glued Freeze Spray works well)
- Rubbing alcohol
- Cotton ball
- Blow dryer
- Silk scarf
How to Secure Your Wig with Holding Spray
Pour some rubbing alcohol onto a cotton ball and wipe the skin directly in front of your hairline. Doing so will remove any excess oils and make it easier for the spray to adhere to your skin.
1. Put on your wig so it lays the way you intend to wear it.
2. Starting at one end, gently lift the front of your wig and liberally spray the hairspray right in front of your natural hairline. You don’t want to get the spray on your hair.
3. Use a blow-dryer to dry the spray until it becomes tacky. This should only take a few seconds.
4. Press your wig into the spray and hold it for 10-15 seconds.
5. Repeat the process on the opposite end to secure the wig in place.
6. In 2-inch sections, spray the holding spray through the wig and onto your hairline.
7. Push the section into the spray using the end of a rattail comb and dry it with a blow-dryer.
8. Move on to the next section until you’ve worked your way around your entire front hairline.
9. Wrap a silk scarf around the perimeter of the wig and tie it firmly at the nape of your neck. That will keep the wig against your skin while it finishes drying.
10. Once your hair is dry, slowly remove the scarf.
11. Examine your wig and make sure it’s completely dry. Use your blow-dryer to dry up any damp spots.
12. Clean up any excess spray with another alcohol-soaked cotton ball.
13. Style your wig as usual.
Holding Spray Pros
- Hair spray is less damaging than wig glue。
- The spray is undetectable and can hold your wig in place for up to a week.
Holding Spray Cons
- The application process can get messy.
- The method is time-consuming, especially for beginners.
Wig Clips
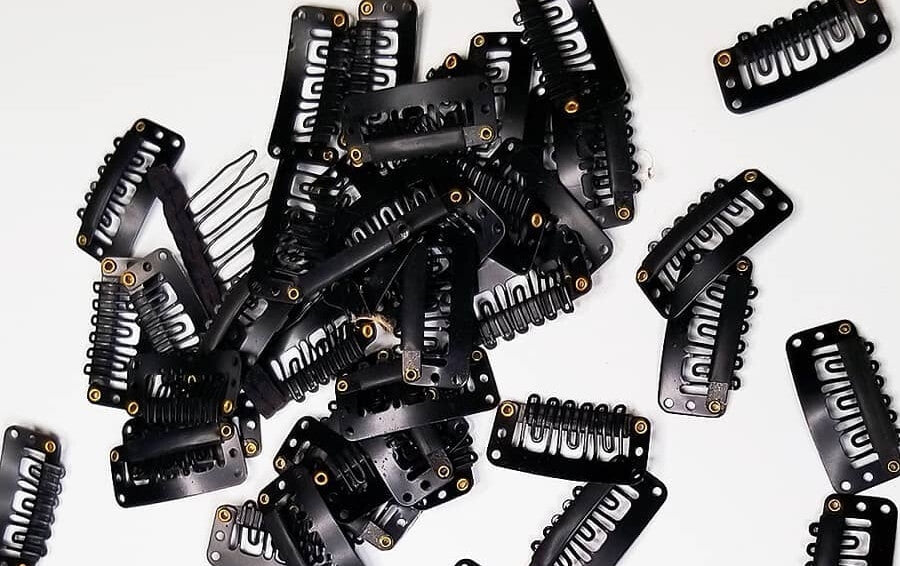
Wig clips are a special type of hair clip specifically designed to hold your wig in place. They’re inexpensive, easy to use, and can create a secure hold that lasts until you take your wig off. Here’s how to give this method a try.
Gather your Supplies
- Wig clips
- Needle
- Thread
How to Use Wig Clips to Hold Your Unit in Place
1. Turn your wig inside out and sew wig clips around the perimeter of your wig. Add a wig clip anywhere you want the wig to fit more securely. Make sure the teeth of the comb are facing outwards, toward your hair.
2. Use as many or as few clips as you need.
3. Pull the wig onto your head and slide the combs of the wig clips through your natural hair.
4. Clamp the clips closed to secure them.
5. Check the fit of your wig and style as usual.
Wig Clip Pros
- Wig clips are less damaging than adhesive.
- Clips are easy to use, even for beginners.
Wig Clip Cons
- Wig clips only work if you have hair.
- Wig clips don’t secure your wig very tightly.
Elastic Band
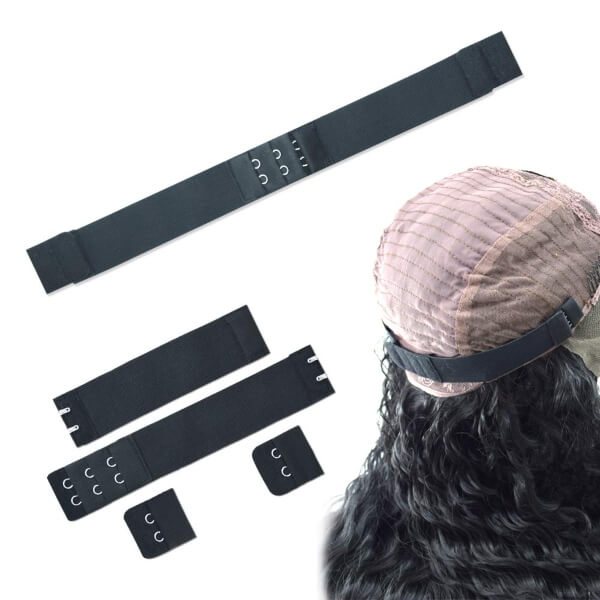
Elastic bands can usually be found on glueless wigs. The elastic band holds your wig in place and help to create a flat, natural-looking hairline. Unfortunately, not all wigs come with an elastic band, so you may have to sew one onto your unit yourself. Here’s how to secure a wig with an elastic band.
Grab These Items from the Store:
- Elastic band
- Measuring tape
- Needle
- Thread
- Scissors
How to Secure a Wig with an Elastic Cap
1. Use a soft tape measure to measure your head from ear to ear. Take note of your measurement in inches.
2. Decide how snug you want your wig to be. For a looser fit, subtract one inch from the circumference. If you want the wig to be extra snug, subtract 2 inches.
3. Cut your elastic to the length you ended up with.
4. Sew each end of the band onto the ear tabs on both sides of your wig cap. Keep your stitches as close as possible.
5. Try on your wig and check its fit. You can remove the stitches and adjust them as needed.
Elastic Cap Pros
This method doesn't use chemicals or adhesives, so it’s gentle on your hairline.
You won’t have to worry about sweating through glue, gel, or spray.
Elastic Cap Cons
The lace might not lay completely flat.
Wig Grips
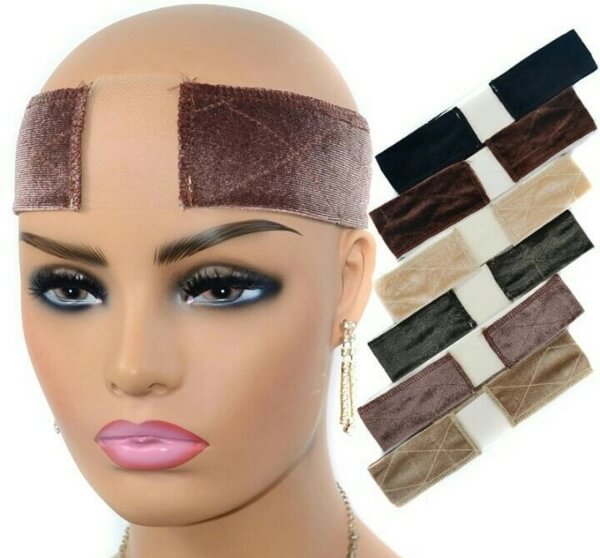
Wig grips are headbands made from a non-slip material that you wear underneath your wig. It keeps your wig from sliding around and can be used with an elastic band or wig clips to minimize slippage. All you’ll need is a wig grip – we’ll tell you how to use it below.
Wig Grip Instructions
1. Open your wig grip and put it on like a headband.
2. Fasten the ends using the velcro tabs.
3. Starting from the front and working your way down the sides, pull your wig onto your head.
4. Pull the wig onto the rest of your head.
5. Examine your wig and adjust any gaps you find.
6. Shake your head to make sure the wig is secure.
7. Style your wig.
Wig Grip Pros
- Wig grips are incredibly gentle on your edges and hairline.
- Wig grips can make a wig more comfortable.
Wig Grip Cons
- Wig grips can contribute to overheating.
- Wig grips look bulkier than some other methods.
Bobby Pins
Bobby pins are a hair staple that doesn’t need an introduction. In addition to securing your natural locks, bobby pins can help keep your wig in place. We’ll tell you how to use them!
How to Secure a Wig with Bobby Pins
1. Put on your wig and adjust it to fit the way you want to wear it.
2. Lift your wig and slide a bobby pin through the weft or cap and into your natural hair.
3. Repeat the process anywhere your wig needs to be more secure.
4. Touch up your style, and you’re ready to go.
Bobby Pin Pros
- Bobby pins are very inexpensive and easy to find.
- You can use this method with other techniques.
Bobby Pin Cons
- Bobby pins can rip the lace on lace front wigs.
- Bobby pins can scratch your scalp or tug on your strands.
- This method isn’t as effective as other methods.
The Best Way to Secure a Wig Without Wig Glue
When trying to figure out which method to use, there are a few things to consider. Here are some tips to help you narrow down which technique to use.
For maximum hold and a natural result > Hairspray. Hairspray can keep your wig in place for days and leave your lace undetectable.
For beginners > Wig clips, bobby pins, or elastic bands. All of these are quick and easy to use.
For easy wig installation and removal > Elastic bands. It takes seconds to pull on or take off a wig secured with elastic bands. This makes them perfect for anyone who’s short on time.
Note: If you have little to no hair, we recommend passing on the bobby pins and wig clips. They may not be able to secure your wig safely, and could make hair thinning and breakage worse. Also, avoid hairspray if you’re prone to overheating or concerned about sweating. Sweating will lead to wig slippage.
We hope that one of the methods we went over in this article is precisely what you were looking for to secure your wig. We recommend trying a few different techniques to determine which one works best with your hair and lifestyle. You might even want to combine a few for a customized solution.


